- It's something else to install.
- You have to either
- Manually add the key(s) to Pageant each time you need to access your repo or
- Configure Pagent to load the keys on windows startup, which means being prompted for your passphrase for each key, even if you don't need them. A nuisance when you end up with multiple repos.
- The latest version of Putty conforms to a different standard for SSH keys, so you have to convert them to use them.
When using multiple keys, I prefer a different method. Roll on the config file!!
SSH Config
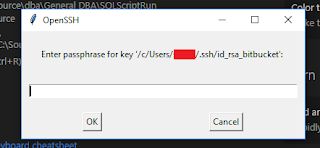
With the advent of the AddKeysToAgent option since OpenSSH version 7.2 (February 2016), you now have the option to be prompted to add a key only when it's needed. That's pretty cool. This is done via an SSH config file. Check out the help page for more detail if you need to, but the below was suitable for my purposes. Namely accessing multiple GIT repos with minimal fuss.
First, you need to create the config file in your .ssh folder. The file needed is just "config" (no extension). In this file we'll put something like the following (adjust to your needs):
Host bitbucket.org
    HostName bitbucket.org
    User git
    IdentityFile ~/.ssh/id_rsa_bitbucket
    AddKeysToAgent yes

Host work.bitbucket.org
    HostName bitbucket.org
    User git
    IdentityFile ~/.ssh/id_rsa_work
    AddKeysToAgent yes

Host github.com
    HostName github.com
    User git
    IdentityFile ~/.ssh/id_rsa_github
    AddKeysToAgent yes
With this, I can have multiple keys, and only have the relevant one loaded when I actually need it. I have two BitBucket accounts (one for work and one personal) as well as a personal GitHub account. Let's break the above down.
Host: This is our alias. We actually change our repo URL's domain to match this. So for example, if I wanted to clone the repo git@bitbucket.org:me/repo.git which is in my work account, I would have to change the URL and run the following command:
- git clone git@work.bitbucket.org:me/repo.git
Note that we've changed the URL to include "work." Everything that sits in the Host block is the config for that domain alias. If you already have a repo cloned and you need to change the URL, run "git remote set-url."
HostName: This is where the alias URL maps to. The actual domain.
IdentityFile: The path to the private key for your chosen account. i.e. without the .pub extension.
AddKeysToAgent: The magic bit. When set to "yes" it will dynamically load the key for your Host alias when its domain is called.
For extra info on the config, check out the online docs, but that's it for me.
SSH-Agent
Let's change it to this:
env=~/.ssh/agent.env

agent_load_env () { test -f "$env" && . "$env" >| /dev/null ; }

agent_start () {
    (umask 077; ssh-agent >| "$env")
    . "$env" >| /dev/null ; }

agent_load_env

# agent_run_state: 0=agent running w/ key; 1=agent w/o key; 2= agent not running
agent_run_state=$(ssh-add -l >| /dev/null 2>&1; echo $?)

if [ ! "$SSH_AUTH_SOCK" ] || [ $agent_run_state = 2 ]; then
    agent_start
fi

unset env
Try it!
Visual Studio Code
There is a way to streamline this though. I simply created a .sh file with just the word "code" in it. I then created a windows shortcut to run that file using Git for Windows. I made it prettier by adding the VS Code icon to the shortcut and used that for kicking Code off. It will even dynamically prompt you when access to a repo is needed.
The only downside being that launching Code via the context menus doesn't do it. Not perfect but close to it.
Who would have thought accessing GIT could warrant three posts, but this was part of my educational journey and was more about understanding than simply following a set of prescribed steps.
I hope this helps someone else. Let me know. Adios.
Part 1: HTTPS
Part 2: SSH


Thank you so much! I'd been struggling to make VS Code work with Gitlab.
ReplyDelete